Air Fryer Chicken Breast — Time, Temperature & Tips
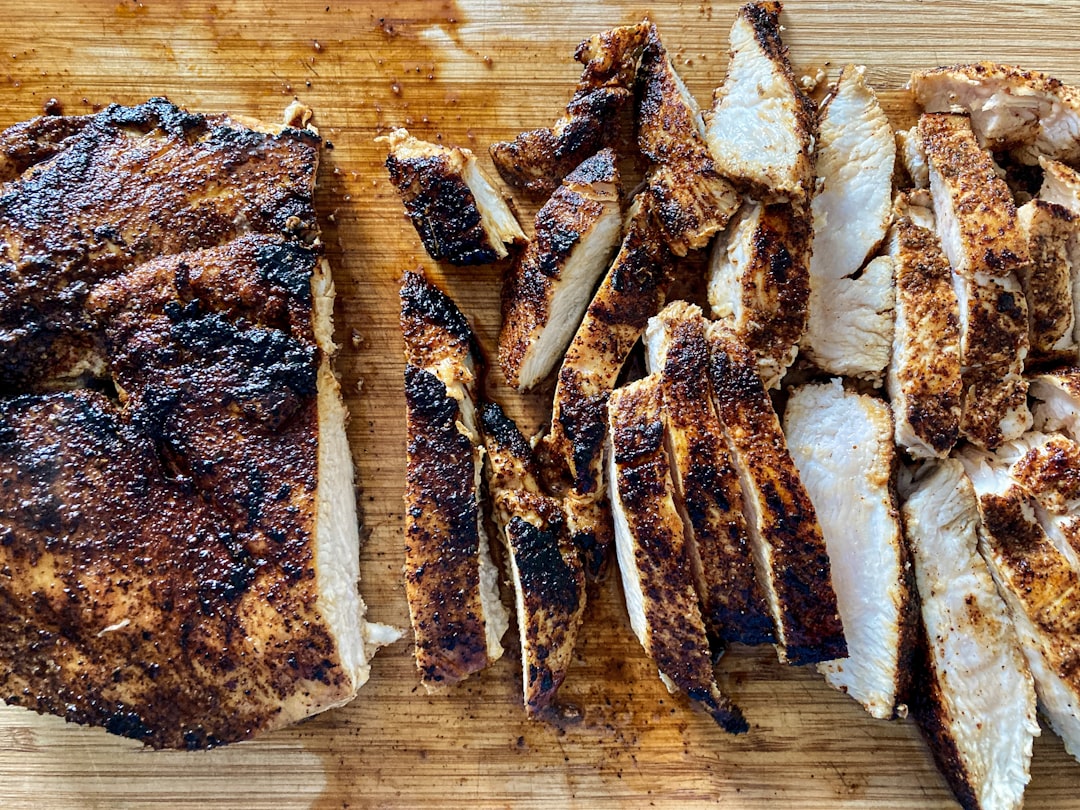
Photo by Thomas Park on Unsplash
Quick Answer: Cook boneless, skinless chicken breast at 375°F (190°C) for 18–22 minutes, flipping halfway through. Always check with a meat thermometer — the safe internal temperature is 165°F (74°C). Thickness matters more than weight, so a thick 8 oz breast needs closer to 22 minutes.
What You’ll Need
You only need two things beyond your air fryer to get this right every time:
- Instant-read meat thermometer — guessing with chicken is how you end up with dry or undercooked meat. A reliable thermometer takes the guesswork out completely. Check ThermoPro TP-03 on Amazon →
- Olive oil or avocado oil spray
- Your preferred dry rub or seasoning
In This Guide
Time & Temperature Chart
Use this as your reference every time. Adjust by 1–2 minutes if your chicken is especially thick or thin.
| Chicken Type | Temperature | Time | Internal Temp |
|---|---|---|---|
| Boneless, skinless (6 oz / 170g) | 375°F (190°C) | 16–18 min | 165°F (74°C) |
| Boneless, skinless (8 oz / 225g) | 375°F (190°C) | 18–22 min | 165°F (74°C) |
| Bone-in chicken breast | 380°F (193°C) | 25–30 min | 165°F (74°C) |
| Thin-sliced (½ inch / 1.2cm) | 375°F (190°C) | 10–12 min | 165°F (74°C) |
| Frozen (boneless) | 360°F (182°C) | 28–32 min | 165°F (74°C) |
The USDA recommends 165°F (74°C) as the minimum safe internal temperature for all poultry. Do not rely on color alone — pink chicken can be safe if it hits 165°F, and grey chicken can still be undercooked.
🍳 Best air fryer for chicken breast: The Cosori 5.8Qt runs true to its set temperature and fits two large breasts side by side without overlapping — the most common cause of uneven cooking.
How to Cook Chicken Breast in an Air Fryer
Step 1 — Pat the chicken dry
Use paper towels to pat the chicken dry on both sides. Removing surface moisture is the single most important step for getting a browned exterior instead of a steamed one. Do this even if your chicken looks dry already.
Step 2 — Season generously
Brush or spray a light coat of oil on both sides, then apply your seasoning. Garlic powder, smoked paprika, salt, and black pepper is a reliable baseline. Press the seasoning in with your hands so it sticks.
Step 3 — Preheat your air fryer
Preheat to 375°F (190°C) for 3 minutes. A cold basket drops the cooking temperature the moment food goes in, which leads to uneven results. Most air fryers have a preheat button — use it.
Step 4 — Cook and flip halfway
Place chicken in a single layer with space between each piece — do not overlap. Cook for half the total time, flip once, then cook the remaining time. Flipping ensures even browning on both sides.
Step 5 — Check the internal temperature
Insert your thermometer into the thickest part of the breast, away from bone if bone-in. You are looking for 165°F (74°C). If it reads 160°F, give it 2 more minutes and check again.
Step 6 — Rest before cutting
Let the chicken rest on a plate for 3–5 minutes before slicing. Cutting immediately releases all the juices onto the cutting board instead of staying in the meat. This rest time is what separates dry chicken from juicy chicken.
Tips for Juicy Results
- Pound thick breasts to an even thickness before cooking. An 8 oz breast that is 1.5 inches thick on one end and 0.5 inches on the other will be overcooked on the thin end before the thick end is safe.
- Don’t skip the oil. Air fryers circulate very hot dry air. Without a thin oil coat, the surface dries out before the center cooks through.
- Brine for 15 minutes if you have time. Dissolve 1 tablespoon of salt in 1 cup of cold water and submerge the chicken for 15–30 minutes. Rinse, pat dry, and season as normal. The difference in juiciness is significant.
- Use room-temperature chicken. Cold chicken straight from the fridge takes longer to cook through, which means more time for the exterior to dry out.
Common Mistakes
- Overcrowding the basket. Overlapping pieces block airflow and cause uneven cooking. Cook in batches if needed.
- Cooking at too high a temperature. 400°F (200°C) sounds faster, but it dries out the exterior before the inside reaches temperature. 375°F (190°C) gives you more control.
- Skipping the thermometer. Cooking times are a guide — your specific air fryer, the size of your chicken, and whether it came from the fridge all affect the actual cook time. A thermometer is the only reliable way to know it is done.
- Cutting immediately after cooking. This is the most common reason chicken feels dry even when it is cooked correctly. Always rest for at least 3 minutes.
Variations
Frozen Chicken Breast
Cook from frozen at 360°F (182°C) for 28–32 minutes, flipping at the halfway mark. Add seasoning after the first 10 minutes once the surface has thawed enough for it to stick. Always verify 165°F (74°C) — frozen chicken has more variation in thickness than fresh.
Thin-Sliced Chicken Breast
Thin cutlets (around ½ inch thick) cook in 10–12 minutes at 375°F (190°C). Watch them closely after 8 minutes — they overcook fast. These are ideal for wraps, salads, and meal prep.
Marinated Chicken Breast
Marinate for 30 minutes to 4 hours in the fridge. Pat off excess marinade before cooking — too much liquid in the basket creates steam instead of crisp air circulation. Acidic marinades (lemon, vinegar) will make the surface slightly tougher if left on too long.
Bone-In Chicken Breast
Increase temperature to 380°F (193°C) and cook for 25–30 minutes. The bone slows heat transfer to the center, so bone-in always needs more time than boneless at the same weight. Check temperature near the bone — that is the last part to reach 165°F (74°C).
Air Fryer Brand Differences — How Timing Varies
Not all air fryers run at the same true temperature, even when set to the same number. This matters more for chicken than almost any other food because the safe internal temperature window is narrow — overcook by 5 minutes and the meat turns chalky.
Cosori (Pro LE, Pro II, Dual Blaze)
Cosori models run close to true temperature, which makes the times in the chart above reliable starting points. The square basket design on most Cosori units fits two standard chicken breasts without overlapping — ideal for meal prep. Use 18–20 minutes for a 7 oz breast.
Ninja (AF101, AF161, Foodi)
Ninja air fryers tend to run slightly hot — about 10–15°F above the set temperature in some units. Start checking internal temperature at the 16-minute mark for boneless breasts, not 18. The Foodi models with pressure cooker lids should always use air crisp mode, never pressure cook, for chicken breast.
Philips (Essential, Premium, XXL)
Philips models use a star-shaped basket that allows excellent airflow from all sides. They run true to temperature and often cook slightly faster than Cosori at the same setting. Reduce time by 1–2 minutes if using a Philips with the default basket.
Instant Vortex
Instant Vortex models have a slightly slower preheat than Ninja or Cosori. Add 1 extra minute to the chart times if you notice your unit takes longer than 3 minutes to reach cooking temperature. The larger Vortex Plus basket is ideal for batch cooking multiple breasts at once.
Meal Prep — Cooking in Bulk
Air fryer chicken breast is one of the best proteins for weekly meal prep. It reheats well, stays moist in airtight containers, and pairs with almost any grain, salad, or vegetable.
Batch cooking tips
- Cook in two rounds, not one overcrowded basket. Overlapping chicken steams rather than air fries. Two properly spaced rounds will produce better results than one overcrowded one.
- Season each batch differently — one with garlic paprika, one with Italian herbs — so your meal prep does not feel repetitive by day three.
- Slice after cooling, not while hot. Sliced hot chicken releases moisture faster. Let it cool to room temperature before cutting and storing.
- Store flat in airtight containers with a paper towel underneath to absorb any condensation. This prevents sogginess.
Cooked chicken breast keeps for 3–4 days in the refrigerator at 40°F (4°C) or below.
Storage and Freezing
Refrigerator (3–4 days)
Store cooked chicken breast in an airtight container. Do not leave it at room temperature for more than 2 hours — bacteria multiply rapidly between 40°F and 140°F (4°C–60°C). Label containers with the date.
Freezer (up to 3 months)
Wrap individual portions in plastic wrap or freezer bags, removing as much air as possible. Freeze within 2 hours of cooking. For best texture, use within 3 months — chicken technically stays safe longer, but quality degrades after that point.
To thaw: move from freezer to fridge the night before. Never thaw chicken at room temperature.
Reheating Air Fryer Chicken Breast
The air fryer is the best way to reheat cooked chicken breast. A microwave steams the exterior and makes it rubbery. The air fryer restores a slightly crisp exterior without drying out the interior.
Reheat method: Place refrigerator-cold chicken breast in the air fryer basket. Set to 350°F (175°C) for 3–4 minutes. No need to flip for reheating. Check that the internal temperature reaches 165°F (74°C) again before eating.
If the chicken is frozen (not thawed), reheat at 320°F (160°C) for 8–10 minutes, checking temperature at the 8-minute mark.
Nutrition Information
A standard 6 oz (170g) boneless, skinless chicken breast cooked with 1 teaspoon of oil contains approximately:
- Calories: 165 kcal
- Protein: 31g
- Fat: 4g (mostly from the oil)
- Carbohydrates: 0g
- Sodium: Varies by seasoning
Chicken breast is one of the leanest protein sources available. The air fryer method uses significantly less oil than pan frying (1 tsp vs 1–2 tbsp), making it lower in calories than the equivalent stovetop result.
📷 Get the Free Air Fryer Cheat Sheet
Time & temp charts for chicken, fish, vegetables, and frozen foods — all in one place. Free, instant.
No spam. Unsubscribe anytime.
Frequently Asked Questions
Can I stack chicken breasts in the air fryer?
No. Stacking blocks the hot air circulation that makes air frying work. Cook in a single layer with at least half an inch of space between pieces. If you have more chicken than fits, cook in two batches.
Why is my air fryer chicken breast dry every time?
Dry chicken is almost always caused by one of three things: overcooking past 165°F (74°C), cutting without resting, or cooking without oil. Check your thermometer calibration, let the chicken rest for 3–5 minutes before slicing, and always use a light coat of oil on the surface.
Do I need to flip chicken breast in the air fryer?
Yes, for most air fryers. Flipping halfway through gives you even browning on both sides. Some basket-style air fryers with a top-down heating element can produce acceptable results without flipping, but flipping is the safer default.
What temperature should chicken breast be in an air fryer?
375°F (190°C) is the ideal temperature for boneless, skinless chicken breast. It is hot enough to brown the exterior without drying it out before the center cooks through. Bone-in breasts do slightly better at 380°F (193°C).
Can I cook chicken breast from frozen in the air fryer?
Yes. Cook frozen boneless chicken breast at 360°F (182°C) for 28–32 minutes, flipping halfway. Add seasoning once the surface thaws (around the 10-minute mark). Always confirm 165°F (74°C) internal temperature before serving.
Should I cover chicken breast in the air fryer?
No. Covering traps steam and prevents the air circulation that creates a browned surface. Leave the chicken uncovered for the full cook time.
How long does cooked air fryer chicken breast last in the fridge?
Cooked chicken breast keeps for 3–4 days in an airtight container in the fridge. Slice after it has fully cooled to prevent excess moisture buildup. Reheat in the air fryer at 350°F (175°C) for 3–4 minutes to restore the surface texture.
Related Articles
- Air Fryer Not Turning On — 5 Fixes That Actually Work
- Best Air Fryers — Tested & Ranked
- Best Air Fryer Accessories Worth Buying
About the Author
Ruma Aktar is a home cook who has tested dozens of air fryer models and accessories since 2023. Every guide on AirFryerFix is based on real hands-on experience — not copied or AI-generated content. If you own an air fryer and have a question, you will find an honest answer here.